Finishing a 100-year-old quilt top: a maple leaf quilt from an Iowa farm
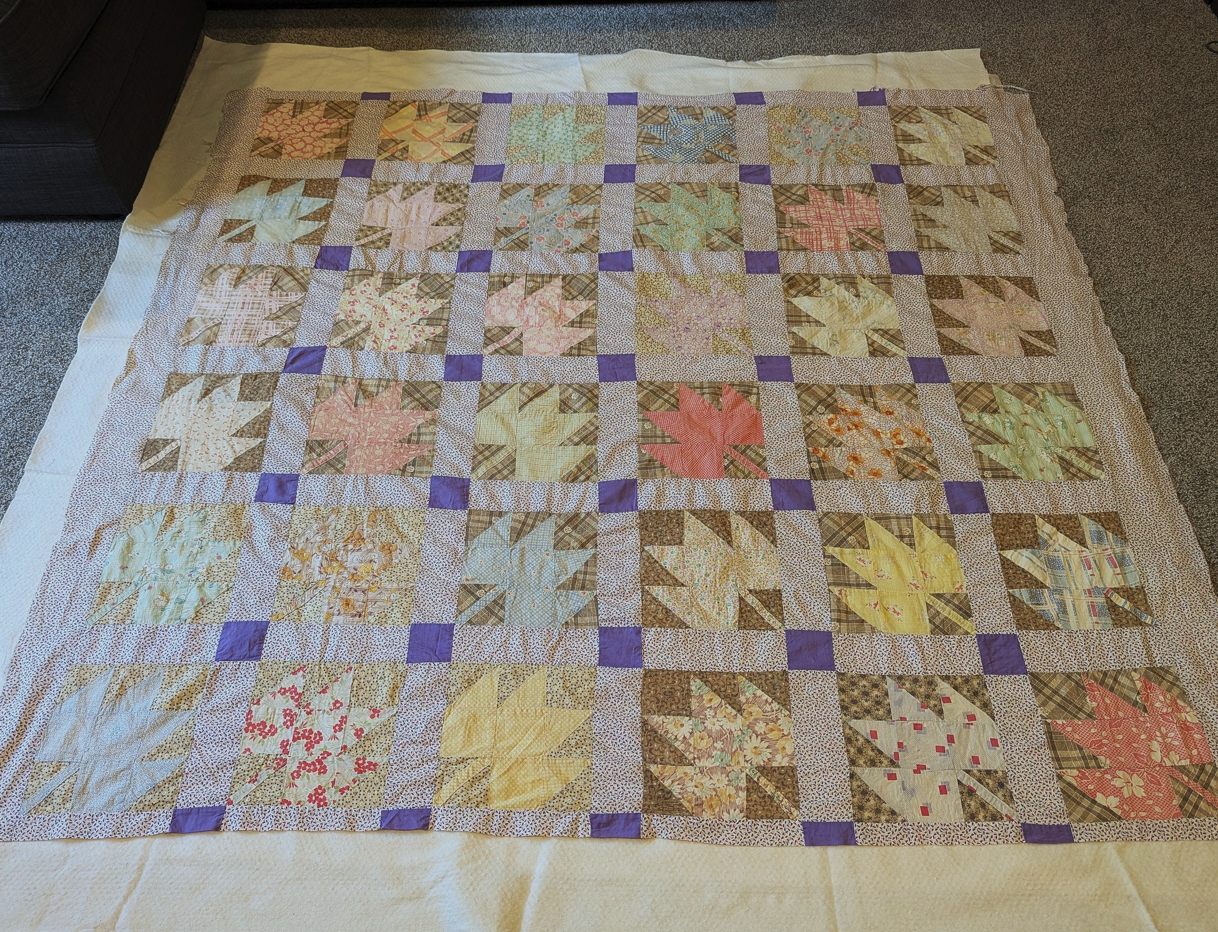
When a good friend who knows nothing about quilts hands you a century-old quilt top and asks if you might do something with it, my first thought was: how hard could it be? Maybe I could have it done this weekend.
It took a lot longer than a weekend, and it turned out to be one of the most nerve-wracking projects I have ever taken on.
Where the quilt top came from
My friend Tammy found the quilt top in a drawer on her husband’s family farm in Iowa. His family had lived on that farm for over 100 years, and the top was made by his aunt, an avid seamstress. After she passed away, the family was going through her things to sell the farm, and there it was.
Tammy wanted me to turn it into a real, usable quilt with batting and backing — that cozy thing we all know and love to bundle up in. I said yes. I knew it would mean a lot to her to have someone she trusted make those decisions, and I had finished plenty of quilts before. What I hadn’t realized was how different this old fabric would be to work with.
Taking stock: what could be saved
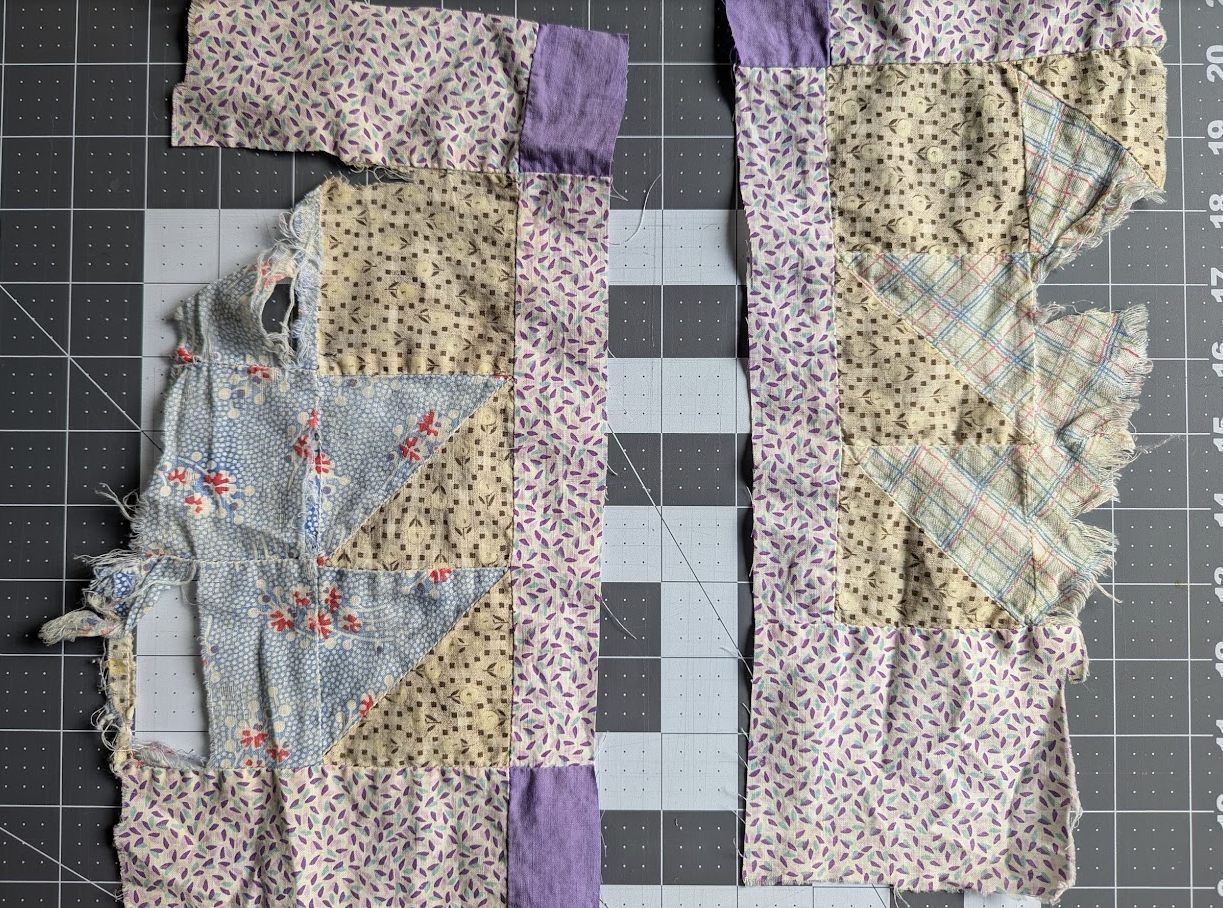
Most of the outer blocks were so frayed they couldn’t be saved, and because a quilt has to stay rectangular, that meant trimming whole rows from the edges, not just the damaged blocks. When all was said and done, I was working with a 6 by 6 (36-block) maple leaf quilt with sashing and cornerstones.
My goal wasn’t to make the quilt look new. It was to preserve as much of the original top as I reasonably could while making it stable enough to finish and use.
Asking a quilt historian
My teacher and mentor, Mary Lewis, teaches quilting, sewing and surface design at Lake Washington Technical College in Kirkland, Washington. She’s also a quilt historian with a wealth of knowledge about historical fabrics and quilts.
I first met Mary years ago, when I asked if I could sit in on her class for an hour to see whether quilting was really for me. I was hooked before the hour was up and enrolled for the rest of the semester. One semester turned into several, and it was in Mary’s classes that I learned to quilt as an adult. She knows how particular I am about efficiency and accuracy, and our many conversations about what quilting software could and couldn’t do helped shape the ideas behind PatchOwl. So when this quilt top landed in my lap, I took it straight to Mary before making a single stitch.
Just by looking at the fabrics, Mary placed the prints and colors somewhere between the early 1900s and around 1930. She explained the color and print characteristics that were typical of that era and how they showed up in this quilt. Mary thought many of the fabrics were likely cut from feed sacks, which fit with what we knew about the quilt’s origins: a farm family making the most of everything they had. Tammy now had a story to go with the quilt she plans to give her daughter. I, on the other hand, was getting more and more nervous. What if I didn’t make good choices on behalf of this quilt?
I should say that I’m not a quilt restorer or conservator. I’m simply an experienced hobby quilter who took this project very seriously — and who was fortunate to have someone far more knowledgeable to ask for advice.
Planning the quilting
The plan was always to machine quilt. I don’t enjoy hand quilting, and I love the even, consistent stitches I get by machine. I’m also not a longarm quilter, so this historic quilt was going to be quilted on my Janome HD9.
Mary advised outline quilting: stitching about ¼″ inside the seams. It suits the style of the era, and it avoids stitching through any of the old seam threads. I also remembered a tip from one of her classes years ago: start and end each line of quilting with a few very short stitches instead of tying off the thread. That turned out to be invaluable.
To keep handling and turning to a minimum, I quilted in this order:
- 1Outline-quilt the sashing first.
- 2Outline-quilt each maple leaf separately, starting and stopping with tiny stitches, so I never had to wrestle the whole quilt around in one continuous line.
For batting, I used Warm & Natural cotton batting, which Mary has always recommended in her classes. One reason: it holds up well if the quilt ends up hanging on a wall.
And no, I did not wash the top before quilting it. I was too afraid it would fall apart in the water.
Four challenges of quilting a 100-year-old quilt top
1. Matching faded colors
Nothing really looks like faded 1920s fabric except, well, faded 1920s fabric. I was pleasantly surprised to find that fabric manufacturers still release 1930s-style prints — in fact, Lindsay Wilkes released her Traditional 30s line for Riley Blake Designs just last month. But the quilt top in front of me had faded with a century of sun and air, and next to it the new prints looked far too vibrant. I needed a backing and binding that would let the original quilt top shine, faded and all. I settled on a beige in a background-ish color for both (Dear Stella Crimp in Mocha). That choice turned out to be lucky, because the same color came in handy for the next problem.
2. Repairing patches where the fabric had disintegrated
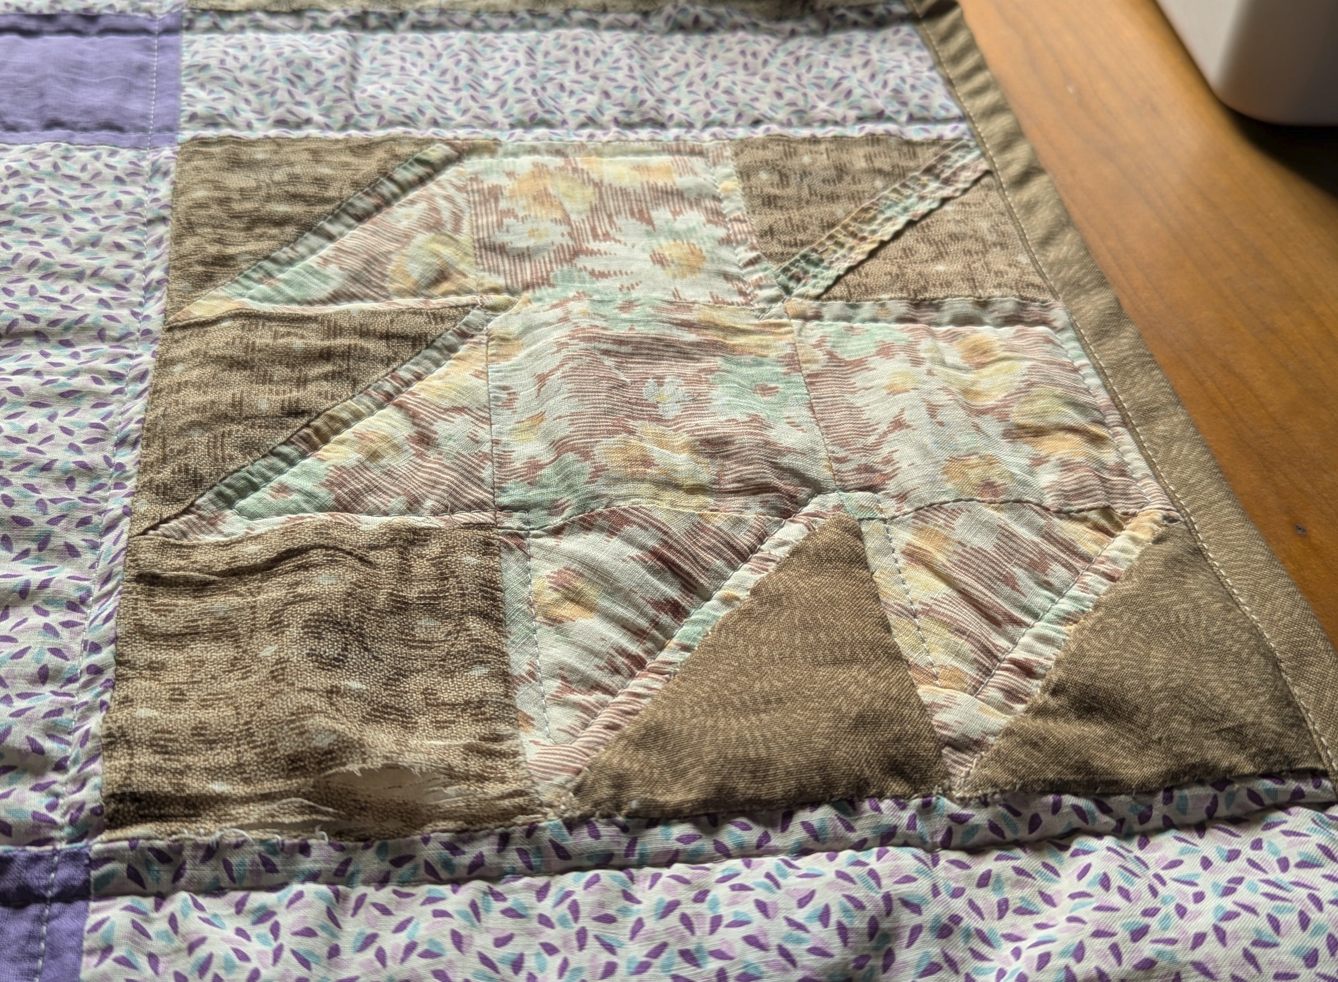
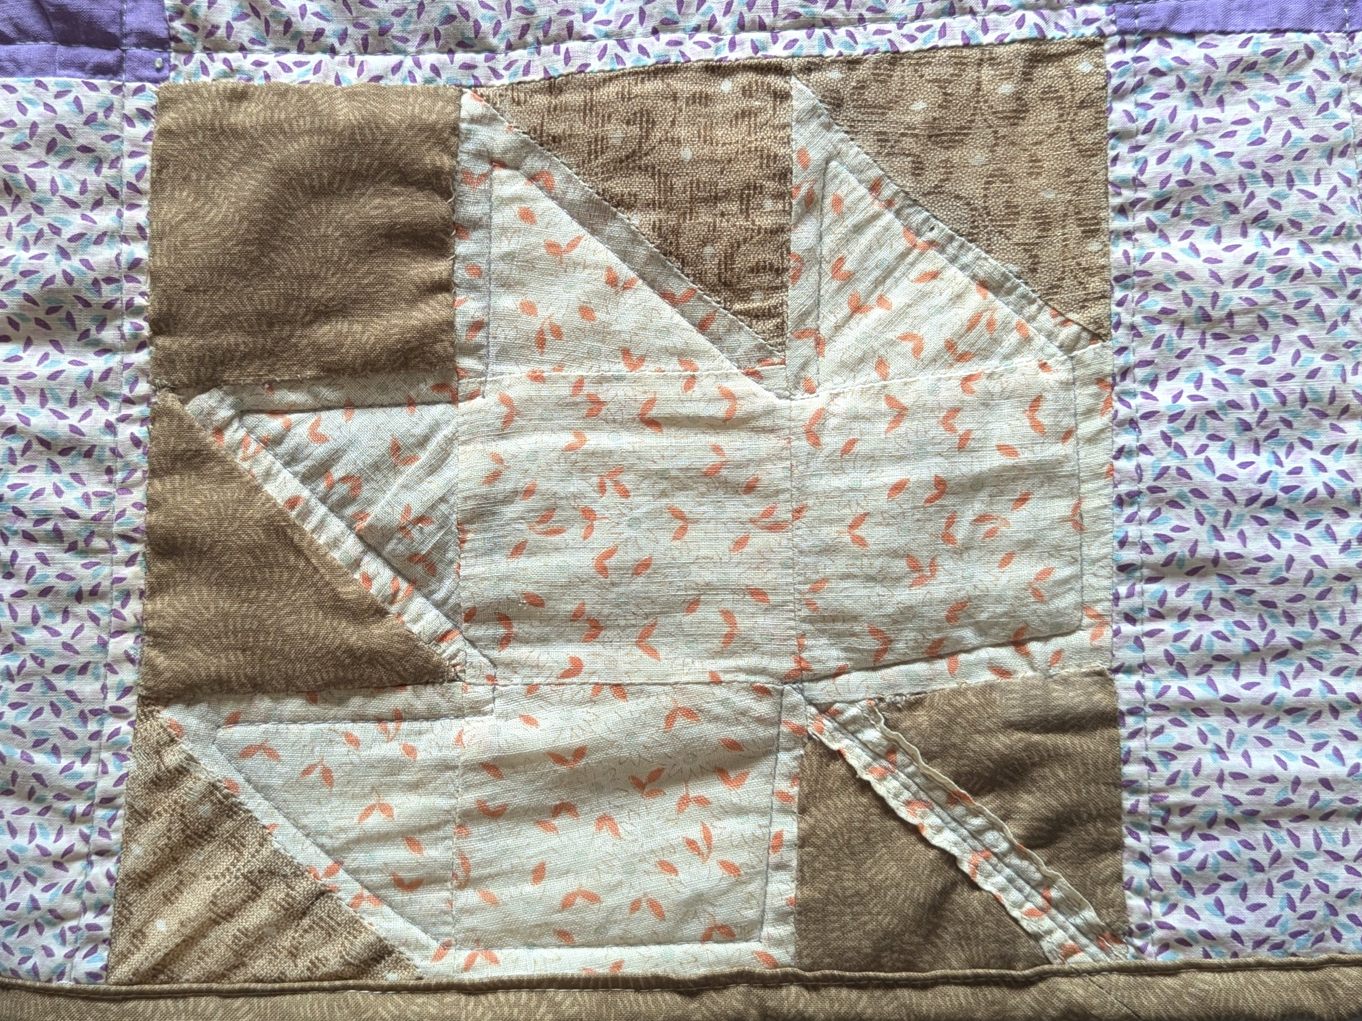
Some patches were too far gone for the small repairs I had originally hoped would be enough. I also ruled out fabric glue pretty quickly. After a lot of searching, I decided needle-turn applique was the best option for this quilt. My first attempt looked bad: my seam allowances were too large, which made the corners bulky. After watching a few needle-turn applique videos, I redid the patches until I was happy. I could match a few patches with original fabric from the pieces I’d cut off, but most needed new fabric.
One of the hardest decisions was knowing when not to fix something. Every worn patch was part of the quilt’s history, so I wasn’t trying to erase its age — only to repair what was necessary to keep it together.
3. Handling the quilt as little as possible
Fabric this old needs all the help it can get. Its own weight can stretch it during quilting, and every bit of handling adds to the wear. I moved my sewing setup to the largest table in the house, rolled the quilt, and went very, very slowly so nothing would snag.
I also bought some huge laundry clips to keep everything neat and supported. The key was that the clips only ever gripped the new backing fabric, never the old top.
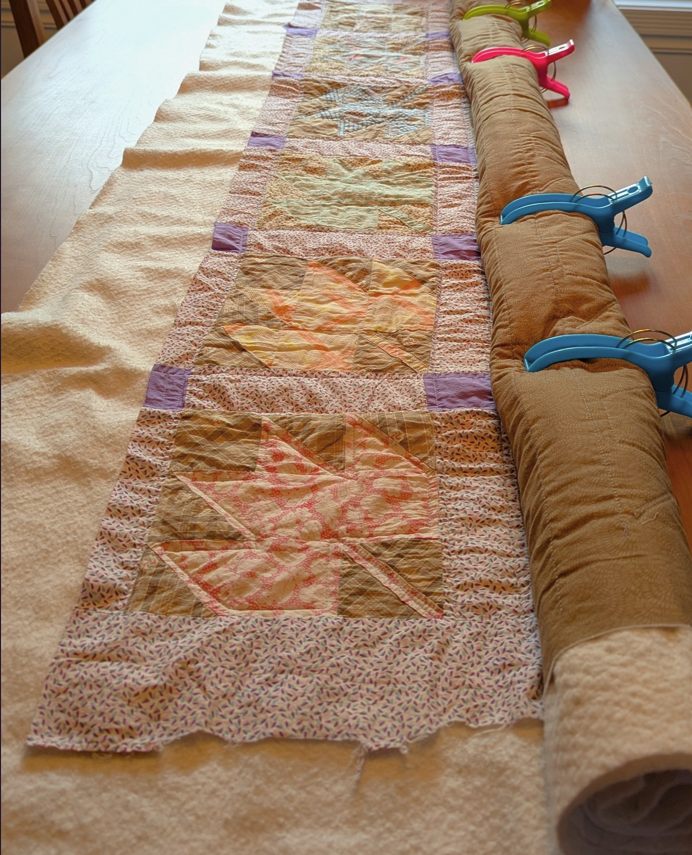
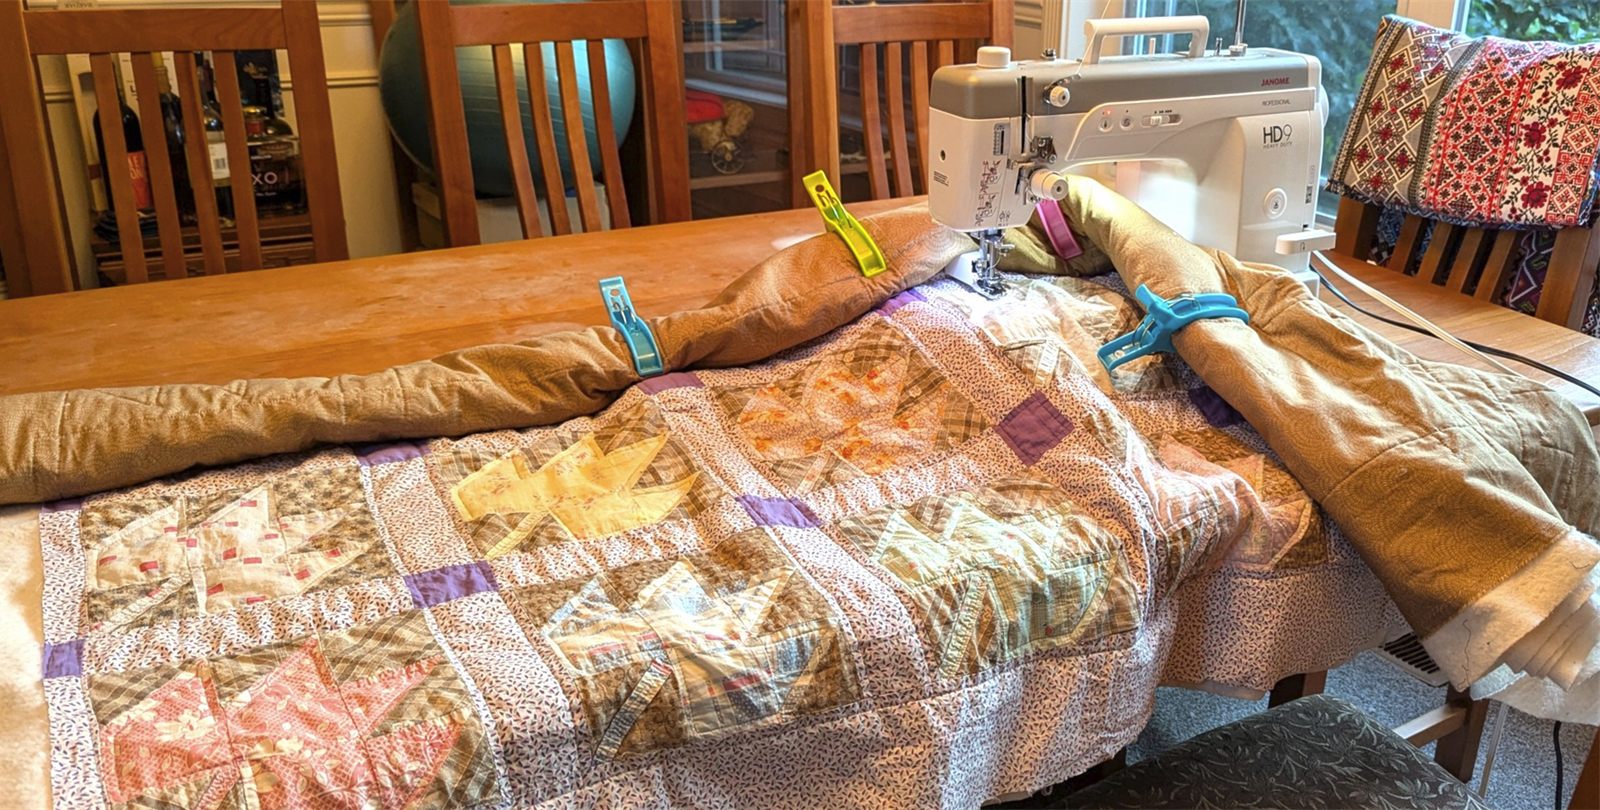
It was an incredibly slow process, and I worried about the quilt the whole time. Thankfully, nothing tore that wasn’t already torn.
4. Planning for aftercare
Replacing every worn patch would have been too much of a facelift. This quilt tells a story, and I wanted that story to have its say.
Tammy wanted to use the quilt rather than hang it, so she declined my offer of a hanging sleeve. I did advise keeping it mostly decorative, but I also know that quilts are made to be used and loved — sometimes literally to pieces. So I gave her plenty of spare fabric and suggested she use the same applique fix if any other patches tear. It will change the quilt over time, but it will also add to the family story. That’s exactly the point.
The binding: my favorite part
I know plenty of quilters who dislike binding with a passion. I’m a fan, maybe because it’s the part that gets you to the finish line and makes a quilt look cozy.
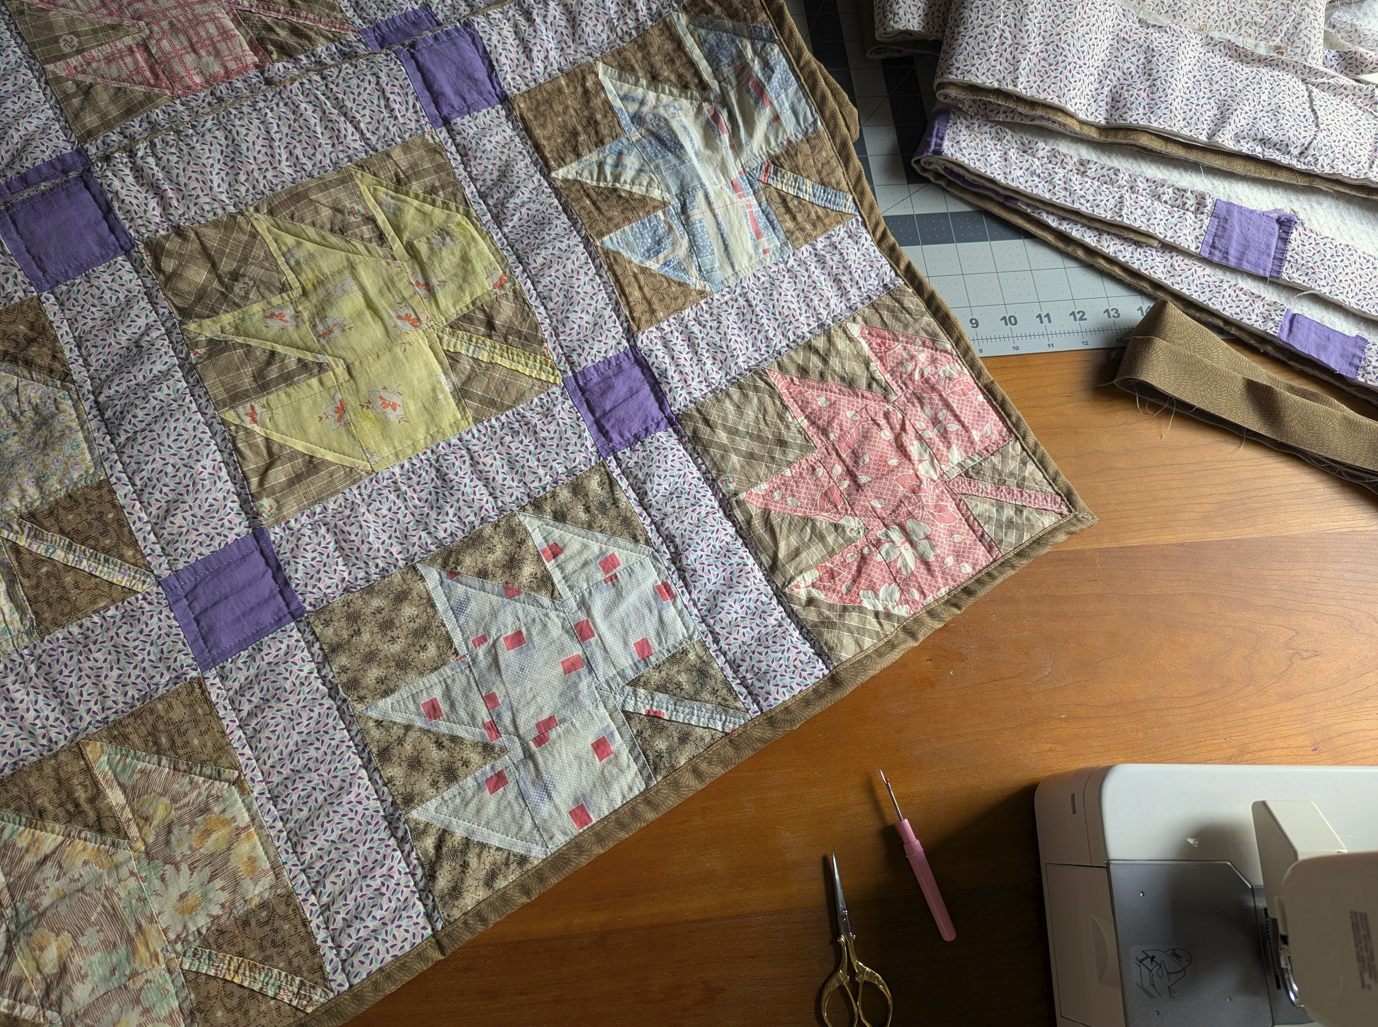
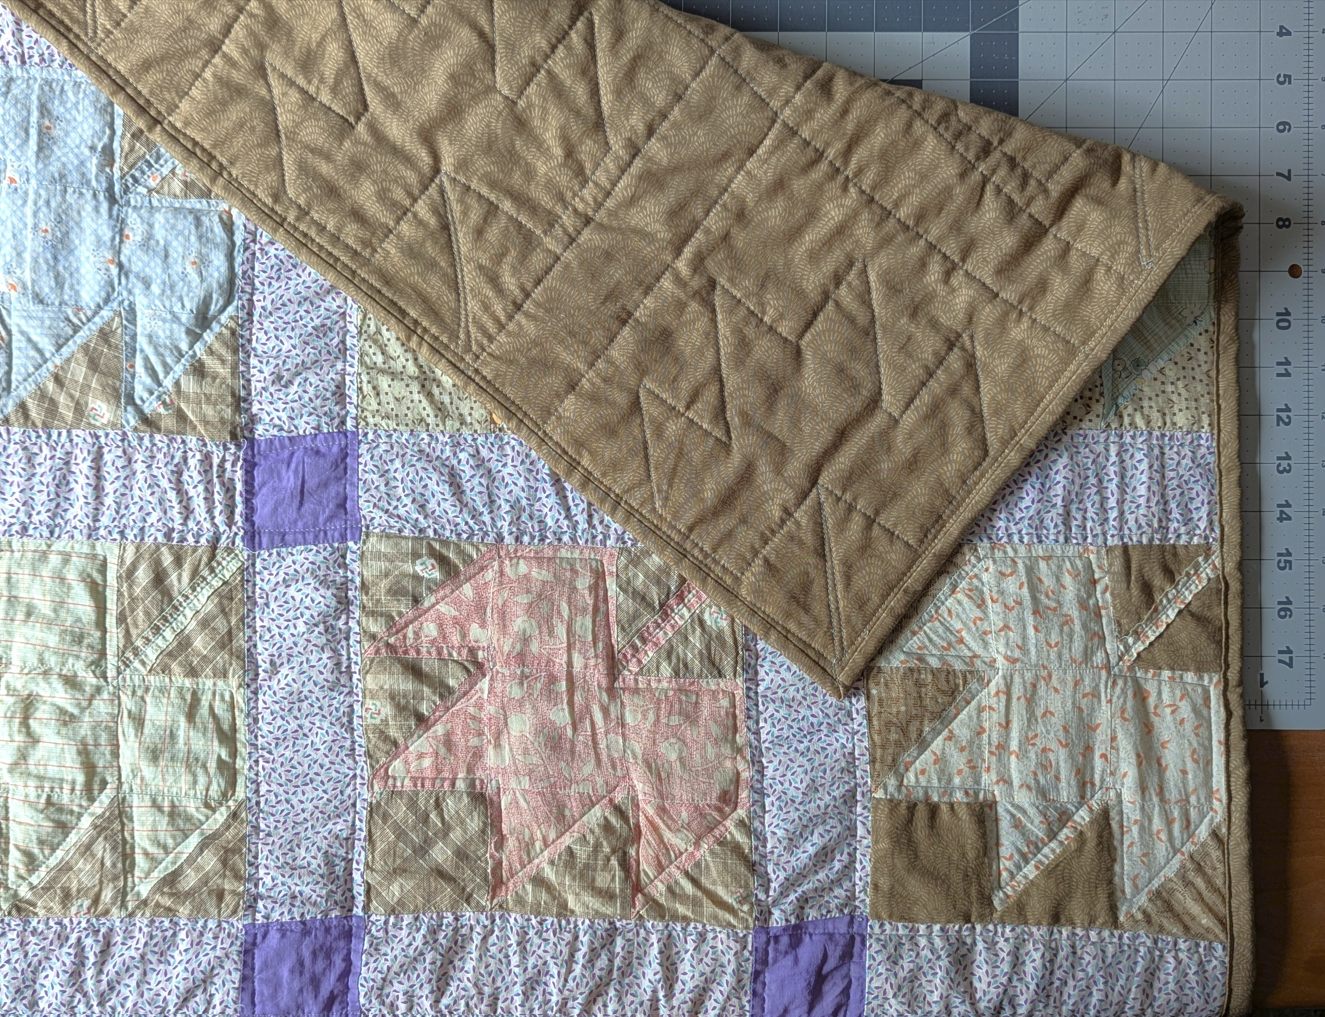
Final inspection complete — now ready to go home with Tammy!
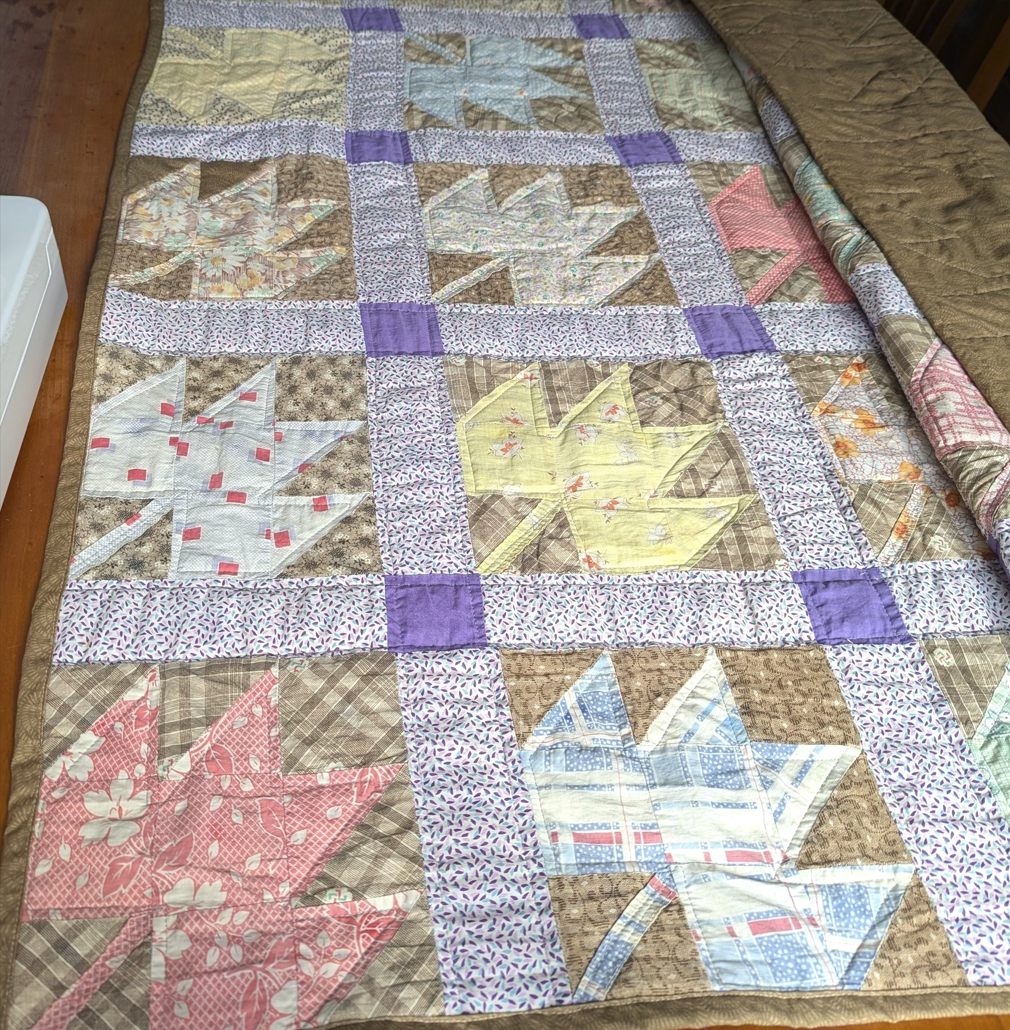
Tammy will be giving the finished quilt to her daughter: a hundred-year-old family story, ready for its next chapter.
Preserving the design for the next generation
Once the quilt was finished, I recreated its maple leaf layout in PatchOwl. The original fabric won’t last forever, but the design can. Having a digital record also makes it easier to plan future repairs — or to recreate the original quilt in new fabrics, with its measurements close at hand.
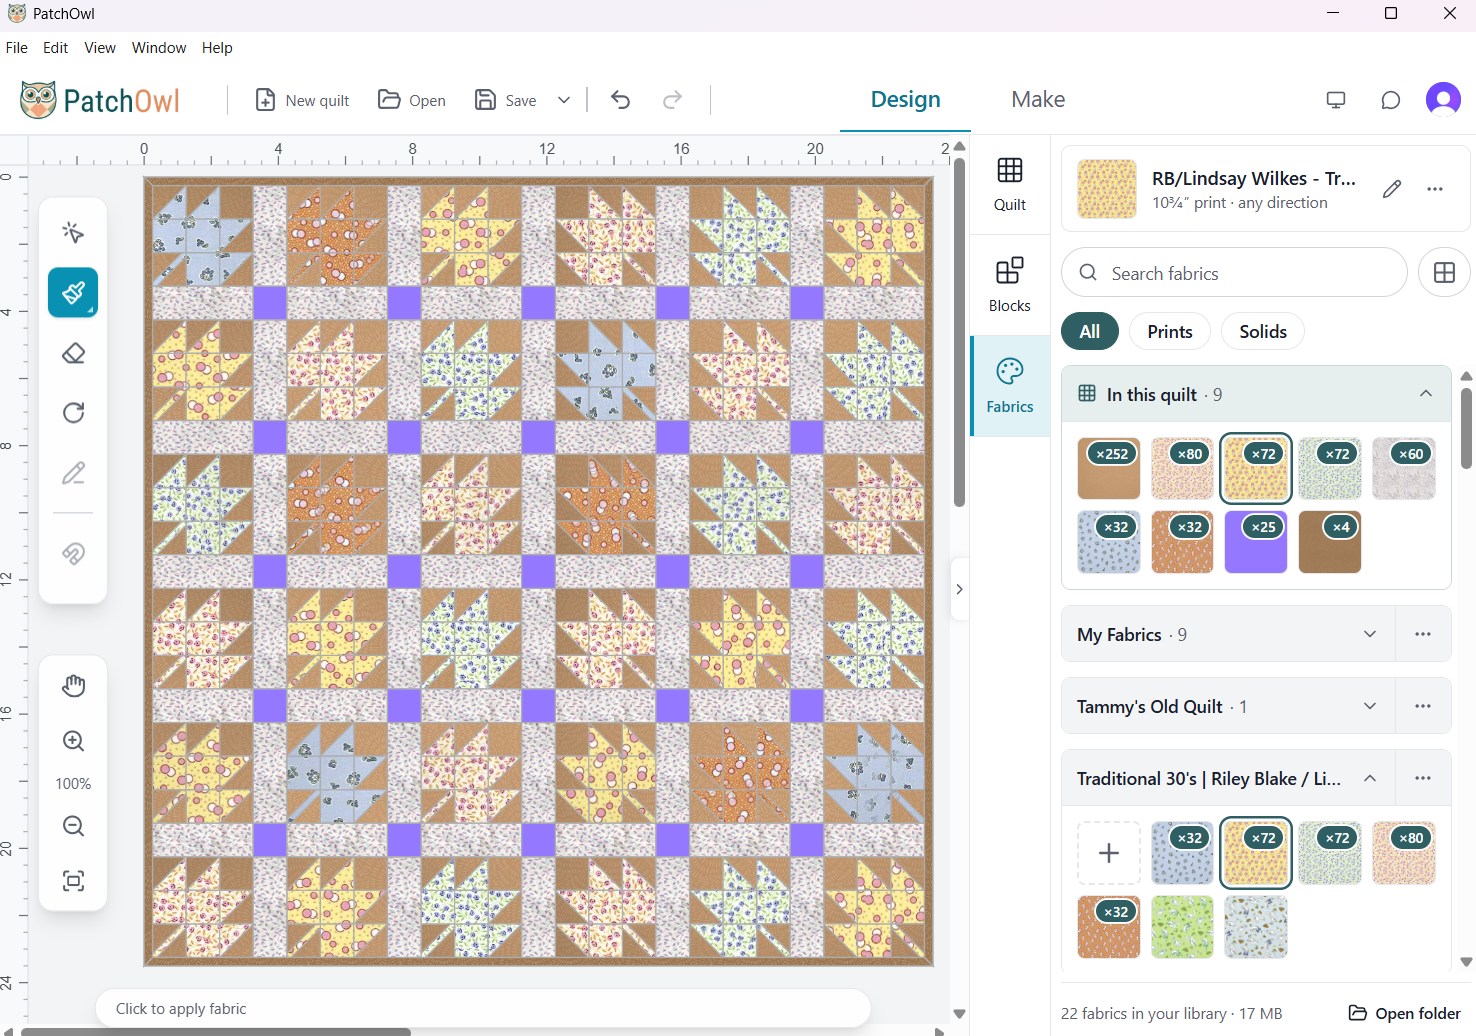
I created this design by uploading digital fabrics with PatchOwl’s My Fabrics tool:
- Maple leaves: a selection from the Traditional 30s line by Lindsay Wilkes for Riley Blake Designs. These miniature prints are inspired by 1930s feed-sack fabrics, a perfect match for the feel of this quilt.
- Background and binding: Dear Stella Crimp in Mocha and Biscuit.
- Sashing: a photo of the original quilt’s sashing fabric, uploaded as a digital swatch.
- Cornerstones: Riley Blake Confetti Cottons in Unicorn.
About the author
Kayoko Stone is a Seattle-area quilter and co-founder of PatchOwl, quilt design software created to help quilters turn ideas into quilts they can actually make. Kayoko gives talks and demos for quilt guilds, both locally and online. Email kayo@patchowl.com to request one for your guild.